Let me tell you something about kitchen cabinets that most people discover too late: they’re not just storage. They’re the visual backbone of your entire kitchen. Get them right and everything else falls into place. Get them wrong and no amount of nice countertops or fancy appliances will save you.
I’ve seen people spend weeks agonizing over countertop choices while barely thinking about cabinets. That’s backwards. Cabinets cover 60-70% of your kitchen’s visual surface area. They dictate the feel, the function, and honestly — a huge chunk of your budget.
This guide covers everything you need to know before you buy a single cabinet. We’re talking design styles, materials, construction quality, layout planning, and installation. Whether you’re doing a full kitchen gut or just refreshing what you have, this is your starting point.
Why Kitchen Cabinets Matter More Than You Think
Quick reality check on costs first.
In a typical kitchen remodel, cabinets eat up 35-45% of the total budget. For a mid-range kitchen, that’s $8,000-$20,000. For a high-end custom job? Easily $30,000-$80,000+.
That’s a lot of money. Which is exactly why you need to understand what you’re buying before you commit.
Beyond money, cabinets determine how your kitchen functions daily. Are there enough drawers? Does the corner space work or become a black hole where your pots go to die? Can you actually reach the top shelves? Is there a good spot for trash and recycling?
These aren’t afterthoughts. They’re the difference between a kitchen you love cooking in and one you dread.
Understanding Cabinet Construction Quality
Not all cabinets are created equal. Not even close.
Box Construction: Framed vs. Frameless
This is the first big choice, and it affects both look and function.
Framed cabinets have a face frame — a border of solid wood attached to the front of the cabinet box. This is the traditional American style. The frame adds structural strength and creates a classic furniture-like appearance. Downside? The frame slightly reduces accessible interior space.
Frameless cabinets (also called full-access or European-style) have no face frame. Doors and drawers attach directly to the box sides. You get about an inch more interior width per cabinet, and the look is cleaner and more modern. They’re also generally easier to install level because you’re working with consistent surfaces.
Neither is universally better. It comes down to your style preference and how your kitchen is being used. Frameless dominates in modern and contemporary kitchens. Framed rules in traditional and transitional spaces.
Box Material: What’s Actually Inside
The box itself — the sides, bottom, top, and back — matters more than most people realize.
Plywood is the gold standard. It’s dimensionally stable (doesn’t warp easily), holds screws better, and handles moisture better than alternatives. If you’re spending money on good cabinets, you want plywood boxes.
Particleboard is the budget option. It’s heavier, weaker, terrible with moisture, and doesn’t hold screws as well over time. Cheap cabinets use particleboard because it’s cheap. You’ll notice after a few years when hinges start pulling out and shelves sag.
MDF (Medium-Density Fiberboard) sits between the two. More stable than particleboard, smoother surface for painting, but still doesn’t love moisture. Often used for cabinet door construction rather than boxes.
Ask any cabinet supplier specifically what the box is made from. If they get evasive, that tells you something.
Joinery: How It’s All Held Together
How the box is assembled matters too. Look for:
Dovetail joints in drawers — the interlocking teeth that create incredibly strong corner connections. A sign of quality drawer construction.
Dado joints for shelf supports — shelves that sit in a groove rather than on adjustable pins are sturdier.
Glued and stapled vs. glued and screwed — screws create stronger connections that hold up over years of use.
Cheap cabinets use staple guns and hope. Quality cabinets use multiple joinery methods that actually hold.
Cabinet Styles and Design Options
Now the fun stuff. What do you actually want them to look like?
Door Styles That Define Your Kitchen
Your cabinet door style sets the tone for your whole kitchen aesthetic.
Shaker style is everywhere right now, and for good reason. Clean, simple recessed panel doors with square lines. They work in modern kitchens, traditional kitchens, farmhouse kitchens — basically everything. If you’re unsure what you want, shaker is almost always a safe bet that won’t look dated in five years.
Flat panel (slab) doors are the most contemporary option. Completely flat surface, no detailing. Clean, minimalist, often seen in European-style kitchens. They show every fingerprint and every surface imperfection, so material and finish quality matter even more.
Raised panel doors have a center panel that’s elevated above the surrounding frame. Classic, traditional, sometimes ornate. Very common in more formal or traditional home styles. They create depth and shadow lines that add visual interest.
Glass front doors — either clear, frosted, or seeded glass — are typically used for upper cabinets. Great for displaying dishes, making a kitchen feel more open, or adding visual variation to an all-wood door design. They also require you to keep what’s inside reasonably organized.
Beadboard doors have vertical grooves creating a cottage or farmhouse feel. Works beautifully in the right context but can feel heavy if overused.
Most kitchens mix styles — maybe shaker doors throughout with a few glass-front uppers, or flat panel lowers with an open shelving section.
Finish Options: Paint, Stain, and Everything Else
How your cabinets are finished affects both look and maintenance.
Painted cabinets give you the most color flexibility. White and off-white are timeless classics. Navy, sage green, and forest green are having huge moments right now. Two-tone kitchens — one color on lowers, another on uppers or the island — add visual interest.
Paint quality matters enormously. Factory-applied paint on quality wood or MDF doors is far more durable than site-painted cabinets. Look for catalyzed or conversion varnish finishes if you want painted cabinets that can handle actual kitchen use.
Stained cabinets show the wood grain beneath, creating warmth and depth. Natural, medium, and dark stains all read differently. Medium-tone wood stains are enjoying a major resurgence after years of the “everything white” trend dominating kitchens.
Thermofoil is a vinyl material heat-fused to MDF. Creates a smooth, easy-clean surface in dozens of colors. Budget-friendly and practical. Downside: it can peel over time, especially near heat sources like dishwashers and ovens.
Laminate is similar to thermofoil but generally more durable. High-pressure laminate (HPL) used in quality commercial applications is extremely tough.
Hardware: The Finishing Touch
Hardware is like jewelry for your cabinets. It’s a small thing that makes a big visual impact.
Pulls vs. knobs vs. no hardware (push-to-open mechanisms) — all work depending on your style. Long bar pulls are modern. Cup pulls are farmhouse. Rounded knobs are traditional.
Metal finish should coordinate with your other kitchen metals: faucet, light fixtures, appliances. You don’t need everything to match exactly, but they should feel cohesive.
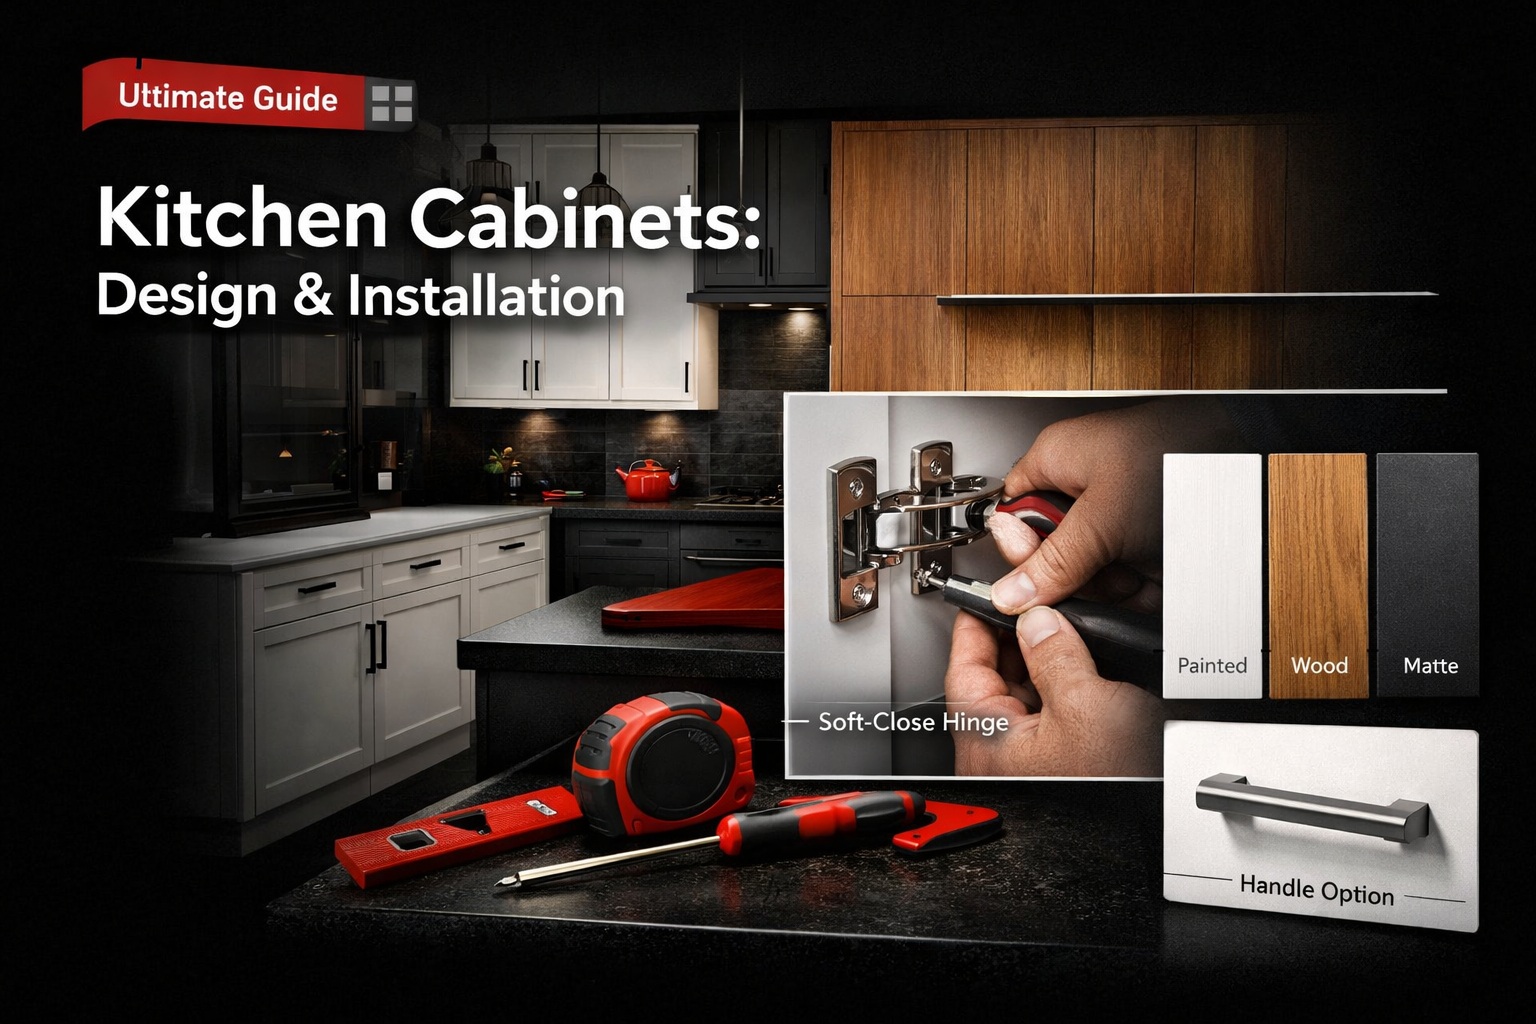
Don’t cheap out on hardware. Quality hardware actually feels different in your hand. Soft-close hinges and drawer glides are worth every extra penny — you’ll touch these things hundreds of times a week.
Material Deep-Dive: Choosing What’s Right for You
Beyond the box construction, different cabinet materials have different strengths.
Solid Wood: The Premium Choice
Real wood cabinets — maple, cherry, oak, walnut, hickory, birch — are the premium option. Natural variation in grain and color. Can be sanded and refinished decades later. Ages beautifully.
Maple is popular for painted cabinets because its tight grain takes paint well. Cherry darkens beautifully over time. Oak has prominent grain that some people love and others find dated. Walnut is gorgeous and expensive.
Downside: solid wood moves with humidity. Expansion and contraction are normal. Can crack if exposed to extreme conditions. More expensive than alternatives.
Plywood Construction
Quality cabinet boxes use plywood regardless of what the doors are made from. Furniture-grade plywood holds up better than anything else for longevity and moisture resistance.
Good custom kitchen cabinet design uses plywood construction throughout — it’s one of the first questions to ask when evaluating any cabinet line.
MDF for Painted Doors
Here’s a somewhat counterintuitive fact: for painted cabinet doors, high-quality MDF often outperforms solid wood. MDF doesn’t have grain that telegraphs through paint, doesn’t expand and contract as dramatically, and takes paint more consistently.
Many premium cabinet manufacturers use MDF for their painted door lines specifically for this reason. It’s not a compromise — it’s the right material for the application.
Kitchen Layout Planning
You can’t pick cabinets without a solid layout plan. The two decisions are completely intertwined.
The Kitchen Work Triangle (and Why It’s Still Relevant)
The classic kitchen work triangle — the path between your refrigerator, stove, and sink — is old advice that still holds up because it reflects how people actually cook.
You want efficient movement between those three points without tripping over an island or walking long distances for every task.
Your cabinet layout should support that triangle, not fight it. Upper cabinets near the stove for spices and cooking supplies. Lower cabinets and drawers near prep areas for tools and cutting boards.
Upper vs. Lower Cabinet Ratios
Standard layout puts upper cabinets on the wall space above lower cabinets. But not every wall needs upper cabinets.
Open shelving instead of uppers in some sections creates visual breathing room and makes kitchens feel larger. Works great if you have attractive dishes worth displaying.
Tall floor-to-ceiling pantry cabinets pack in enormous storage in a narrow footprint.
Fewer upper cabinets and more lower drawers is a highly functional approach — most things you use daily are in lower cabinets anyway, and drawers are far more accessible than deep cabinet shelves.
The Island Question
Islands add prep space, storage, seating, and visual interest. They also require enough room that traffic flows freely around them. You want at least 42 inches of clearance on working sides, 36 inches minimum on non-working sides.
Islands can have cabinets on one or both sides, open shelving, or decorative panels. They’re often a place to use a different color or finish to create visual contrast.
Don’t add an island if your kitchen doesn’t have the space. A cramped island makes cooking harder, not easier.
Corner Cabinet Solutions
Corners are where kitchens get awkward. Dead corner space is wasted cabinet space, and standard diagonal or blind corner cabinets have notoriously bad accessibility.
Better options for corners:
Lazy Susans — rotating shelves that bring items forward. Classic solution, still works well.
Pull-out corner drawers — special hardware that brings the entire corner contents out when you open the door. More expensive but dramatically more functional.
Open corner shelves — turning the corner into a display or open storage moment.
Diagonal corner cabinets — cut at 45 degrees for base or upper cabinets. Easier to access than full-corner solutions.
Don’t just accept whatever the default corner solution is. Think about how you’ll actually use it.
Budgeting for Kitchen Cabinets
Let’s talk real numbers because budget affects every other decision.
The Three Tiers
Budget/Stock cabinets ($100-$300 per linear foot installed): Pre-built in standard sizes, limited finish and style options. Major home improvement stores carry these. Quality varies — some are fine for the price, others won’t last a decade. Good option for rental properties or tight budgets.
Semi-custom cabinets ($200-$650 per linear foot installed): Built to order in a wider range of sizes and finishes. More storage solutions and organization options. Better construction quality. The sweet spot for most homeowners — better quality than stock without fully custom prices.
Custom cabinets ($500-$1,200+ per linear foot installed): Built specifically for your kitchen from scratch. Any size, any wood species, any finish, any specialty storage solution you want. Higher quality control. Longer lead times (usually 8-12 weeks). Worth it for non-standard kitchens or when you want something truly specific.
What Drives Cost Up
Material choices — solid wood vs. MDF doors, plywood vs. particleboard boxes.
Finish complexity — painted costs more than thermofoil, specialty finishes cost more than standard.
Hardware quality — soft-close everything, specialty storage, drawer organization systems add up.
Size and count — more cabinets cost more. Taller cabinets (extending to ceiling) cost more.
Installation complexity — kitchens with soffits, irregular walls, or complicated layouts take more labor.
Where to Save, Where to Splurge
Save on: Upper cabinet door style (you handle them less), interior organization systems (you can add these later), basic drawer hardware on secondary areas.
Splurge on: Box construction (plywood is worth it), primary drawer soft-close hardware (you’ll touch these daily), lower cabinet drawers instead of doors with shelves (much more functional).
Planning Your Full Kitchen Vision
Cabinets don’t exist in isolation. They’re part of a bigger picture.
The relationship between your cabinets and countertops is everything. Cabinet color and finish affects what countertop materials look good. White cabinets pair with almost anything. Dark cabinets need lighter countertops to prevent a heavy look. Natural wood tones need countertops that don’t compete with the grain.
Kitchen countertop selection should happen in tandem with cabinet selection, not after. Bring samples together and evaluate them as a system.
Similarly, your flooring choice affects the overall kitchen composition. Kitchen flooring options — tile, hardwood, luxury vinyl — all interact differently with cabinet colors and styles. Light floors with dark cabinets. Warm wood floors with painted cabinets. Test combinations before committing.
If you’re doing a broader renovation beyond just the kitchen, it’s worth thinking about the whole home together. Full home renovation planning helps ensure your kitchen choices feel consistent with the rest of your living spaces rather than looking like a remodel that happened in isolation.
Installation: What’s Actually Involved
Whether you’re hiring professionals or considering DIY, understanding the installation process helps you evaluate bids and catch problems early.
Preparation Before Installation Day
Good installation starts before a single cabinet goes up.
Clearing the space completely: All existing cabinets removed, walls patched and primed. Plumbing and electrical rough-in complete.
Marking reference lines: A level horizontal line marking the top of base cabinets (typically 34.5 inches from the finished floor) and another for upper cabinets. These reference lines account for an uneven floor — because floors are never perfectly level.
Identifying studs: Upper cabinets need to be fastened into studs. Missing studs and hitting drywall alone is how cabinets fall. Mark every stud location clearly.
Checking walls for plumb and level: Walls aren’t always straight. Knowing where the high and low spots are helps installers plan shimming accordingly.
The Installation Sequence
Upper cabinets go first. Always. Working with upper cabinets while base cabinets are out of the way is infinitely easier than trying to reach over base cabinets to install uppers.
Starting upper cabinet installation: Usually start in a corner or at a focal point (like above the range). First cabinet is the reference point everything else aligns to. Level matters enormously — a cabinet that’s even slightly out of level causes alignment problems with every subsequent cabinet.
Hanging upper cabinets: Each cabinet fastened to studs through the mounting rail at the back top of the cabinet. Minimum two screw points into studs per cabinet. Adjacent cabinets fastened to each other through the face frames (framed) or side panels (frameless) for a unified assembly.
Setting base cabinets: Again, starting from a corner or focal point. Base cabinets are shimmed as needed to achieve a level run despite uneven floors. The shims hide under the toe kick.
Connecting base cabinets: Like uppers, adjacent base cabinets fasten together. The whole run should feel like one unit, not a series of individual boxes.
Scribing and fitting: Where cabinets meet walls at the end of a run, filler strips or scribe molding covers the gap between the cabinet and wall. This is where craftsmanship shows — good installers make these transitions look tight and intentional. Bad ones leave visible gaps or awkward spacing.
Installing doors and drawers: Usually done after boxes are in place. Hinges allow three-axis adjustment for perfect door alignment. Takes time to get all doors gap-consistent and level.
Final adjustments: Soft-close hardware adjusted, drawer faces aligned, handles installed.
The Crown Molding Question
Running crown molding at the top of upper cabinets gives a finished, built-in look that makes standard cabinets look significantly more custom. It’s a separate installation step requiring cutting compound angles at corners.
It’s worth it aesthetically. Budget time and money for it if you want that built-in look.
When to Hire vs. DIY
Cabinet installation is one of those projects that looks manageable until you’re mid-way through with a level that won’t cooperate, walls that aren’t square, and three cabinets hanging at slightly different heights.
Skill level required: moderate to high. Patience required: extreme.
If you’re comfortable with tools, have a helper, and have time to be meticulous, DIY cabinet installation is achievable. Mistakes are painful but fixable.
For a full kitchen, I’d generally recommend professional installation. The labor cost is real, but professional installers work faster, have specialized tools (cabinet jacks are a game-changer), and have solved every problem before.
That said, if you’re working with a quality local cabinet showroom, they often handle design, supply, and installation together — which simplifies everything dramatically.
Bathroom Cabinets: A Brief Note
Everything we’ve covered about materials, construction quality, and finish options applies to bathroom cabinets too, with some important differences.
Moisture exposure is more extreme in bathrooms. Plywood box construction becomes even more critical. Finishes need to handle humidity without peeling or warping.
Vanity cabinets are a totally different category than kitchen cabinets in terms of size, configuration, and plumbing considerations, but the quality markers are identical. If you’re choosing bathroom vanity cabinets, apply the same questions: plywood or particleboard? What are the hinges rated for? How is the finish applied?
Cabinet Storage Solutions Worth the Investment
The inside of your cabinets matters as much as the outside.
Deep drawer stacks for pots and pans: Three-drawer stacks replacing a standard two-door base cabinet are dramatically more functional. You can see and access everything without crawling into a cabinet.
Pull-out trash/recycling: A must-have. Keeps trash hidden while making it actually accessible. Usually occupies an 18″ or 24″ base cabinet.
Pull-out shelf systems: Standard shelves inside base cabinets are difficult to use efficiently. Pull-out shelves — shelves mounted on full-extension glides — solve this entirely. Add them at the time of installation or retrofit later.
Spice pull-outs: Narrow pull-out cabinets on either side of the range for spice storage are incredibly functional.
Plate rack pull-outs: Deep base cabinet pull-outs designed specifically for bakeware or plates make vertical storage easy.
Pantry pull-outs: Full-height pantry cabinets with pull-out shelving on both sides of a center shelf are among the most efficiently used spaces in any kitchen.
None of these are cheap add-ons. All of them are worth it.
Common Mistakes to Avoid
Learning from other people’s regrets is significantly cheaper than making the mistakes yourself.
Not ordering enough cabinets: Measure twice, order once. And order extra filler pieces and molding because you’ll need them.
Forgetting about crown molding and light rails: These aren’t included in basic cabinet orders. They’re separate. They take time to install. Budget and plan for them.
Choosing doors before choosing countertops and flooring: These decisions are interconnected. Make them together.
Underestimating lead times: Custom and semi-custom cabinets take 6-12 weeks from order to delivery. Plan your entire project timeline around this.
Not asking about the interior finish: White or natural interior? Cabinets with an interior that matches the exterior look significantly more finished and feel more premium.
Skimping on installation: This is not the place to save money. Poor installation ruins good cabinets.
Finding the Right Partner
Buying kitchen cabinets is a big investment. Who you buy from matters almost as much as what you buy.
Look for showrooms that:
- Have actual cabinet samples you can touch and operate
- Can show you cross-sections of box construction
- Do design consultations with your specific kitchen measurements
- Have a portfolio of completed projects
- Handle the full process from design through installation
- Have transparent pricing and clear timelines
Working with dedicated kitchen design specialists who know cabinets deeply beats buying from a general contractor or big-box store for anything beyond the most basic kitchen. The design expertise alone typically prevents expensive mistakes.
And if you’re thinking beyond the kitchen — maybe a garage conversion or room addition to expand your living space — it’s worth working with someone who can see the bigger picture of how your kitchen fits into your home overall.
The Bottom Line
Kitchen cabinets are a long-term investment. Done right, they last 20-30 years. Done poorly, you’re replacing them in 10. The difference in upfront cost between mediocre and quality cabinets is real but gets amortized over decades of daily use.
Prioritize construction quality over cosmetic flash. Know your layout before you choose anything. Make material and finish decisions together with countertops and flooring, not in isolation. Budget properly — including installation, hardware, and all the trim pieces people forget about.
And take your time. Rushing into a cabinet decision you’ll live with for decades is the most expensive shortcut there is.
Leave a Reply